Objective:To edit asset details for more than one asset at a time.
Permissions:
Full or Modify - FM Handover \ Facilities Management Handover \ Asset Management \ Asset Details
Things To Consider:
This process is ideal for setting tags, manufacture date, installation date, location or other common data points for a collection of assets where the data value is the same.
Steps:
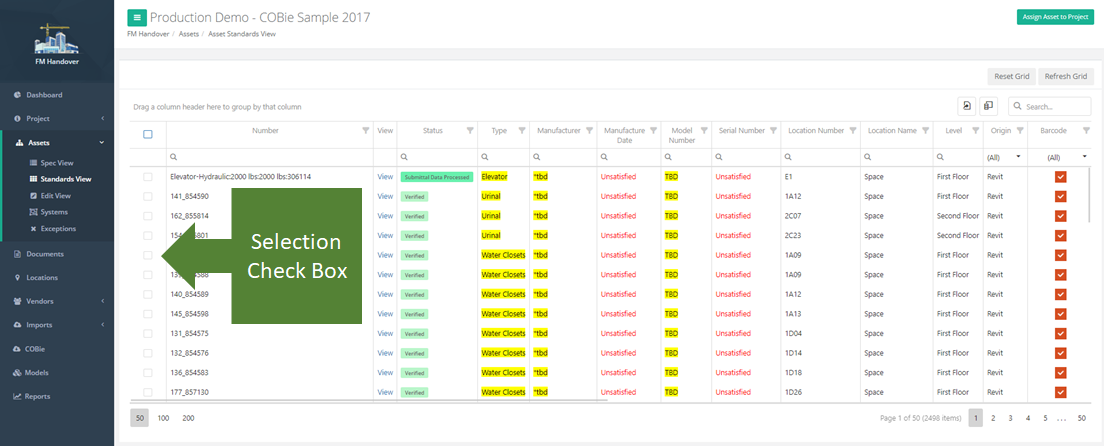
- Navigate to one of the following Project Asset Views: Standards View, Edit View
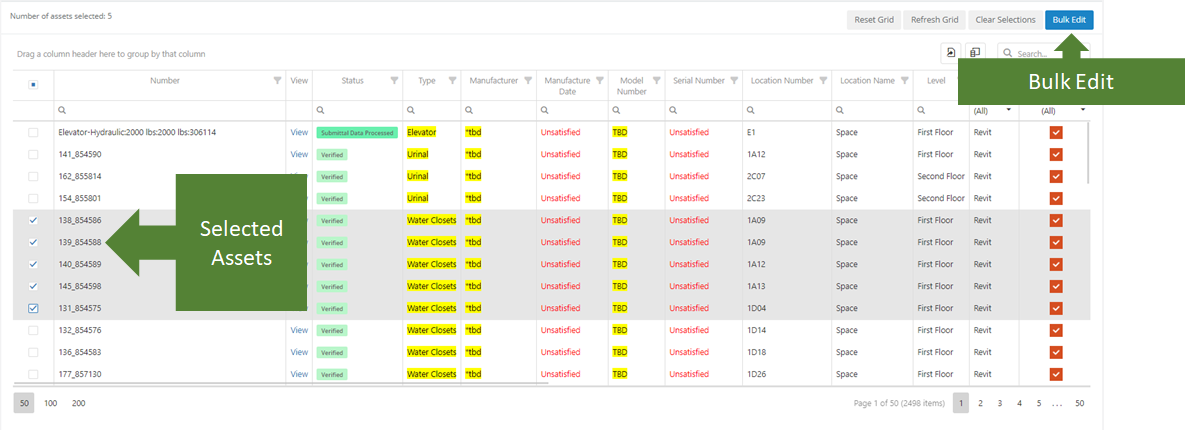
- Use the selection check box in the left column to select the assets you want to edit
- Once you have selected at least one asset the Bulk Edit Button is enabled. Select the bulk edit button to continue the process
- Once you enter the Bulk Edit process the first step is to choose an operation. Your options are:
- Edit Assets - Select this option to edit one or more field values for the selected assets.
- Edit Asset Make, Model, or Type - Select this option to change the make, model or asset type of the selected assets.
- Remove Assets from Project - Select this option to remove the selected asset(s) from the project. (Note: This will not remove the assets from the property)
- Delete Assets from Property - Select this option to remove the select asset(s) from the project and the property.
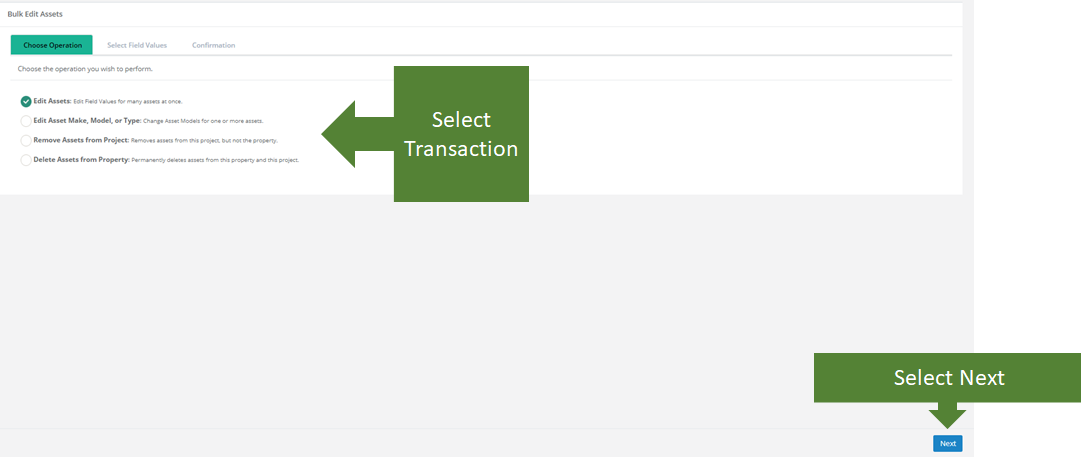
- Edit Assets: After selecting the Edit Assets operation select the next button to continue to the Select Fields Step
- From the Select Fields step, select the fields you want to update by selecting the check box next to that field. Once you have selected a field you may then set the new value of that field.
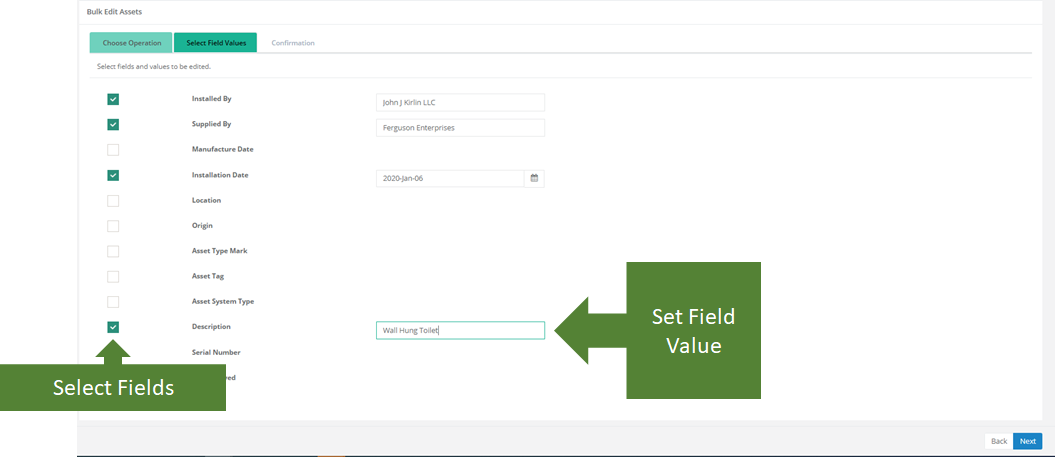
- Once you have set the values for each field to be updated select the next button to continue to the confirmation step.
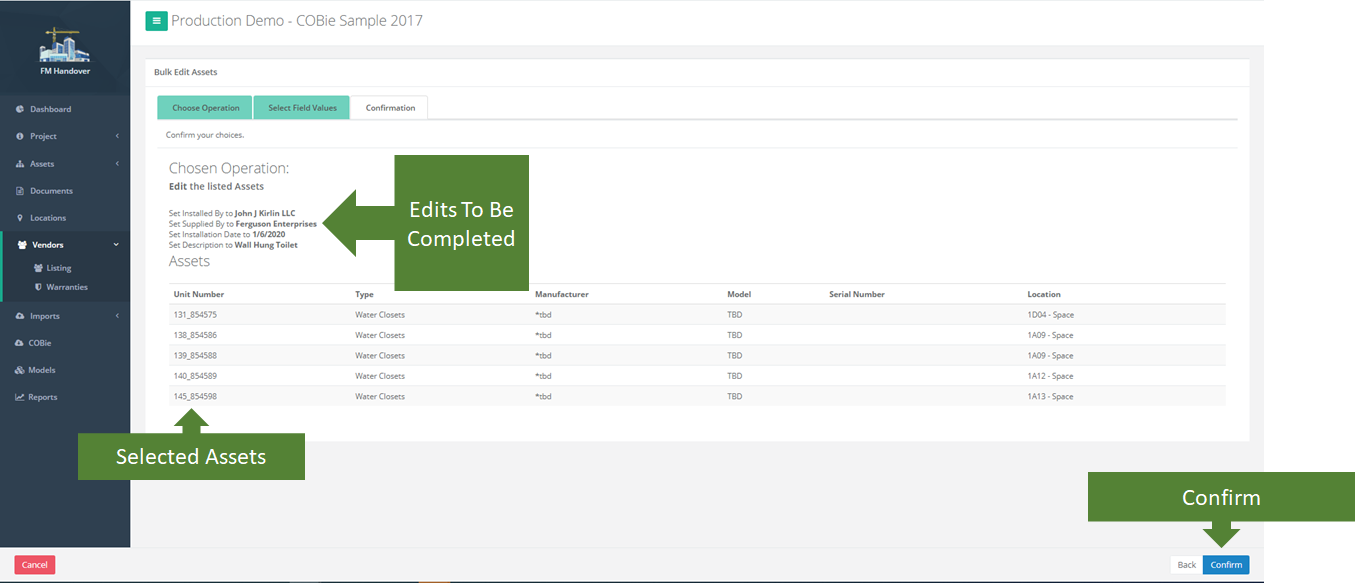
- From the Confirmation Step you will review a summary of the edits to be completed and the list of selected assets those edits will be applied to. If you are satisfied with the edits and the selected assets then select the Confirm button to complete the transaction.
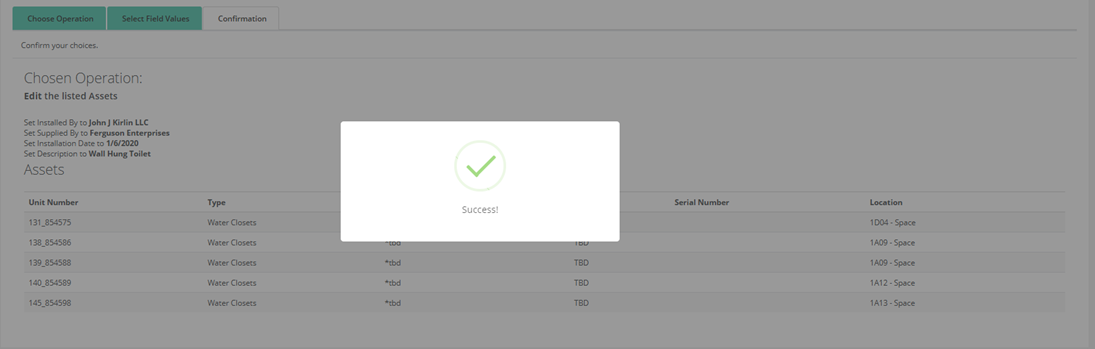
- After selecting confirm you will be prompted to confirm you wish to perform the asset update. Select yes to complete the transaction.

- A confirmation appears once the updates have been completed.
You can select one or more fields to be included in the bulk update.
If you identify an asset in the confirmation list that does not belong, select the Cancel button to cancel the process. This will take you back to the asset list where you can modify the selected assets.
If at any time during the process you wish to go back to the previous step you may do so by selecting the Back button in the lower right corner.
Review the edits and selected assets closely as the bulk update process cannot been undone.